
Thanks to Brain Auer of www.epicedits.com for featuring my favorite photo of all time that I've taken on his "photodump" from FLICKR.
See his blog post: http://blog.epicedits.com/2008/04/20/photodump-04-20-2008/
My photo is in the 1st column, 2nd to last row.
This shot: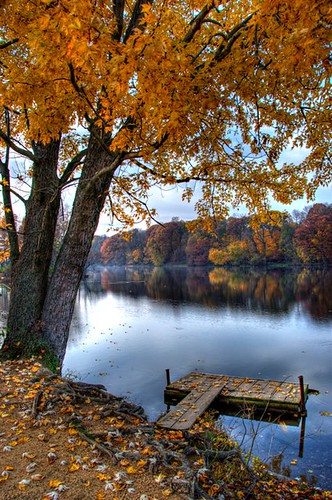
Brian has his own Flickr Photo Pool - feel free to join if you're on FLICKR!
Showing posts with label flickr. Show all posts
Showing posts with label flickr. Show all posts
Monday, April 21, 2008
Featured on Epic Edits Photodump 4-20-08
Thursday, April 3, 2008
Featured Photographer on USA New Jersey Flickr Group
Wow, I feel honored!
I submitted my photo of the interior of the Asbury Park Casino to the USA New Jersey Flickr group and I was chosen as this week's featured photographer for the group!
The group has a blog dedicated to the USA - NEW JERSEY Flickr group. Stop by and check out their blog post mentioning me as this week's featured photographer.
This is the photo they chose to highlight:
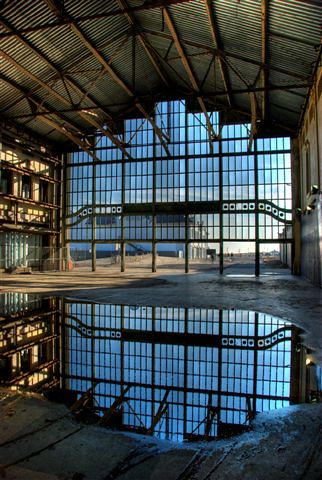
To view the rest of the Asbury Park Casino photos and the history behind it check out this blog post.
Thank you for choosing me! It means a lot to be recognized.
Saturday, February 23, 2008
Eye-Popping & Sharpening Tutorials
Thanks to a tutorial shared by Mark I re-edited these 2 photos below to make my eyes "pop."
You'll find this "eye-popping" tutorial from Parc Cruz on FLICKR: through the link below:
http://www.flickr.com/photos/parc/sets/72157603471515529/
In addition to enhancing the eyes in the photo I also boosted the contrast and tweaked the curves in photoshop to get the final result shown below.
Try this tutorial - it's very easy to do and once you get the hang of it only takes an extra minute or so in your post processing.


The photographer named Parc Cruz that created the eye-popping tutorial on FLICKR also created and shared a sharpening tutorial for the eyes. If you'd like to try the eye sharpening tutorial click the link below:
http://www.flickr.com/photos/parc/sets/72157594375402709/
I tried the "eye popping tutorial" along with the "sharpening" tutorial and these are the results:
No retouching done at all...as you can tell by my skin (ick):

Skin retouching with the clone tool, Noise Ninja applied, curves adjusted, and the 2 tutorials used for eye enhancement and eye sharpening:

Both photos in the examples above were done with completely natural lighting coming through a window.
Parc Cruz also shared some of his Before and After's which are quite amazing. He doesn't share how he does it but they are unbelieavable and I admire his work. See his Before & After's through the link below:
http://www.flickr.com/photos/parc/sets/72157602106578038/
Later in the day (after I got used to these tutorials) I worked on the following photo, edited the original, and then applied 4 other actions to it that I just LOVE!
Original with NO EDITING:

Colored edited and tweaked as well as the eye popping & sharpening tutorials applied:


Monday, November 19, 2007
Tonights Editing Session
I've been working on the fall foliage trip that my sister and I took for a couple days. I still have so much more to go on this series.

I also (finally) added some photos to my flickr account. I've had it for quite a while and I just never have enough time.
Their new uploader makes it really easy to add photos now so I went for it. I figure when I have time I'll upload photos to it from time to time...maybe my favorite recent pieces.
This is the direct link to my Flickr page:
http://www.flickr.com/photos/jenweaverphotography/
Subscribe to:
Posts (Atom)


