
Today I worked on my Do-It-Yourself Lightbox for photography. Below I detailed all of the supplies purchased, directions, as well as illustrations.
The first thing I did was visit the HOME DEPOT. I purchased the following items (below is my actual receipt minus the foam board)

(they charged me for 4 large clamp lights rather than 2 large and 2 small so I had to get that adjusted...so the bill will be a few dollars cheaper)

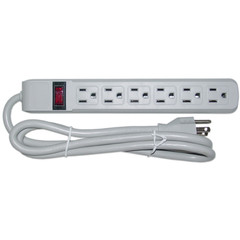
(1) 6 plug power stip
I purchased a really cheap power strip to make plugging in the 4 clamp lights easier.
(1) package of utility masking tape (white)
I visited the paint section at Home Depot to find the whitest colored masking tape I could find. I chose a tape approximately 2 inches wide. I read in another DIY tutorial that you should stay away from duct tape because the heat from the lamps will make the glue very messy. Masking tape is nice & lightweight and if you need to, you can take the tape off to re-adjust (but be careful if you take it off because it can rip off the top layer of the foam board!).

(2) small (5.5 inch) utility clamp lights
(2) large (8.5 inch) utility clamp lights
(For illustration purposes I am only showing one of each)
I was able to get 2 sizes of clamp lights as suggested by another DIY tutorial I found. I'm sure you could go with all 4 of the large size but I wasn't sure how large the box would be in the end and I wasn't sure if it would accomodate 4 large size clamp lights. The larger clamp lights say you can go up to 150 watt bulbs in the lamp and the smaller clamp lights suggest that you do not go over a 75 watts bulb.

5 Sheets of Foam Board 20x30inches
I purchased a 3-pack of sturdy foam board (also called foma core or foam poster board) size 30x40 inches ( I didn't find 20x30). If you go to the local Staples, Office Depot or craft/art store you should be able to pick up large sheets for just a few dollars each (or find a 3 pack!)
Another suggestion I saw was to purchase the (premade) 3-sided science-fair-type boards to save yourself the work of taping the sides to the back.


(4) 100 Watt Light Bulbs
(Note that the smaller clamp lights do not recommend bulbs above 75 watts)
The only bulbs I could find at the Home Depot in 100 watt were the soft white but others recommend 100 watt Daylight Bulbs. I agree the daylight bulbs would work better -- after testing the soft white light bulbs I found they have too much of a yellow cast to them. With your eye the bulbs may all look the same but the camera picks up different colors from different lights. It was mentioned on another tutorial that you can always use a flash and bounce it off the top of the box but some find that sometimes this is too much light and they get by well with just the clamp lights and no flash. I've heard that some people like to experiment with hand held florescent lights. They say it gives off a cool color.

OTHER
(1) T-Square which I did not have so I used a yard stick (a large level would work as well)
(2) Sharp Razor knife
1) Cut the foam boards
If you were unable to find boards 20x30 inches and you were only able to find 30x40 inches you will need to cut the boards in half as I did. I marked the board at the 20 inch point...

...and then I used the box cutter/razor to cut the board in half with the yard stick as my guide.

The edges weren't the smoothest after I cut the boards in half but I think I needed a sharper blade. Smooth edges are very important when trying to line the boards up later for taping!
I know it's overkill but here are the results after cutting the board in half:

2) Now get ready for taping the sides to the back board
*You might want to ask someone to help you when you are taping the boards together.
Hold the boards horizontally (20 height and 30 width)

*It's hard to explain but I will try my best...When you are taping the 2 side boards to the back board you will want to hold the side board edge in front of the back board when taping. Do not tape the edge of the side boards next to the back board or the top will not line up later.
This is how the taping looks from the back:

Once you tape the sides to the back board this is the result:

3) Now tape the top and bottom boards to the 3-sided board you already created
You will have some overhand in the front of the light box but you can trim that later.

4) Trim the overhang
I trimmed the overhang using the yard stick as the guide (you'll need to rotate the box on it's side to do so). I decided to leave a little overhang (about 2 inches) so I have somewhere to clip my clamp lights.
(Pleaes ignore my terrible jagged edges)

Other DIY tutorials I saw cut the over hang off completely and you literally cut out a section of the left and right sides so that the clamp lights are more into the light box. I'm still experimenting and did not want to do that until I tested the box out. This is an alternate example I found:

5) This is what the light box looks like with the overhang cut back to 2 inches hanging over the sides:

6) Attach your clamp lights
I'm not expert on lighting so you will need to figure out how to adjust the clamp lights.

6) Plug your lights in and turn them on!

7) Pick something to photograph!


8) Alternate Options or Additions to your lightbox:
I read about cutting a 3-sided hole (flap) in the top of the lightbox if you like to shoot the object from a top view. If you cut a hole in the top of the box, this is possible. Be careful not to cut too much, you'll want to score the part you don't cut, that makes it bend with ease. I haven't done this myself but I wanted to mention the option in case you were interested.
Also you can cut a square into the sides of the lightbox and cover it with a sheer fabric so that you will be able to side light your lightbox as well. The fabric can be a white muslin fabric found at your local arts and craft store or people suggested other fabrics like White Nylon. You can use masking tape to secure the fabric to the sides of the box in case you want to try out different fabrics.
These 2 examples were taken with the soft white light bulbs and the flash on with the bounce aimed towards the inner top of the light box.
As I mentioned earlier I didn't like the results of the soft white light bulbs so I adjusted the RAW file in Adobe Bridge to get it to look closer to what I was interested in seeing.
(Note: I mistakenly had the ISO at 1600 for the 2 below so they look grainy when you enlarge)


I tried some compact flouresent bulbs to see if they gave a different effect. I only had 60 watt compact florescents so I tried to see what I could get with 4 x 60 watt bulbs.
I also did some tests with adjusting the white balance to the flourescent setting on the camera while using the compact flouresent bulbs. Even with that change I still had to adjust the 2 photos below in Photoshop so that there wasn't a yellowish cast.
Getting the lighting right will take me some time and research. I want to get it perfect because I don't want to be forced to adjust each and every photo I take in the lightbox. If you have any advice on how to properly set ths lighting portion up and what to set the camera (Nikon D80 with SB800 flash) please let me know.
I also read that you should be able to take the photos with the 4 lights and no flash while setting your camera up on your tripod. I tried that as well but since I didn't have the right light bulbs in my results were not what I wanted at this time so I used the flash for these 2 shots with the Gary Fong Lightsphere on (the cloudy colored cap was on) and used my tripod.


I'm not sure of the exact amount of time it took for the total project because I completed the projet throughout the day. I'd leave at least 1-1.5 hours.
*Be careful when you with the foam boards when placing objects in and out of the lighbox. The foam boards seems very easy to scratch or mark up and make scuff marks. You'll want to be very careful and make sure the bottom of the object is clean so that you will avoid the pain of having to clone out marks in photoshop for each and every photo.
*4 lights can be a bit heavy on the front of the lightbox so I suggest placing something on the top/back of the lightbox (not too heavy) to balance out the weight on the front of your lightbox.
*I will be on the hunt for the proper light bulbs and information on how to set the camera properly for these types of shots.
*I need to solve how to avoid seeing the seam/crack where the two boards meet together (between the back board and the bottom board). Unless you are looking diagonally downward over the object you are photographing you will see the the seam/crack in your photos. You can painstakingly remove it in Photoshop or you can find a way to avoid it.
I've read that people have used a tape to make the area curved but I think you will see the tape! I also read a good idea which was to purchase a piece of regular poster board and tape it in a curved angle from the back/top of your lightbox to the front of your bottom board. This will give you a smooth curved appearance for your background.
I'm going to stop at the local office supply store and puchase the posterboard and try that option.
Here is an example of a simple way to make a home studio which is even MORE simplified then mine: http://www.diyphotography.net/homestudio/cheap-homemade-diy-studio-no-lighting-needed
Thanks for reading my step-by-step tutorial. I hope it works for you!
Please drop me a comment on this post to let me know what you thought of it. If you decide to make one for yourself please let me know how it worked for you as well as any suggestions that you may have for me!


5 comments:
omg.... cartoon soooo funny!
Hey, cute cartoon....post pics soon. I can't wait to try my hand at making one.
It also helps to have a handy husband assisting, like me..haha
Jen - how absolutely wonderful - and not a man in sight :)
I must say the initial results are looking encouraging and what a great money saving idea.
One major problem - where do you store it???? - we don't have walk in wardrobes in the uk :)
you are so CRAFTY!!!!
Post a Comment